- Published on
Wplace Extension User Guide

The Wplace Overlay Extension allows you to precisely overlay uploaded images or pixel art onto the Wplace canvas. It supports placing overlays above or below the canvas, fine-tuning position, adjusting transparency, and converting large images into a pixelated display for easier alignment and presentation.
Complete Usage Steps
- Install and Enable the Extension
Visit Wplace Overlay Extension via Google Chrome to install it. Ensure the extension is enabled in your browser's extension manager.
- Open the wplace.live Page
Once the page loads, a small floating panel (the extension control panel) will appear at the edge of the screen.
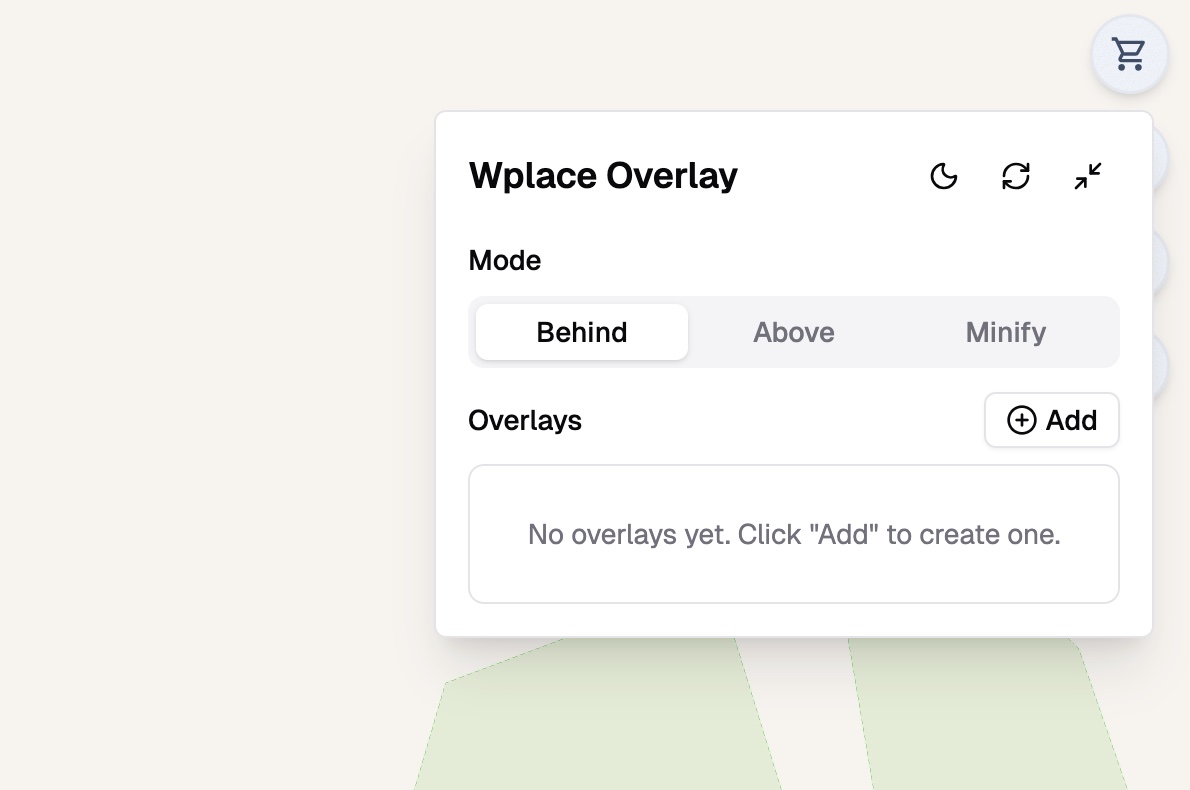
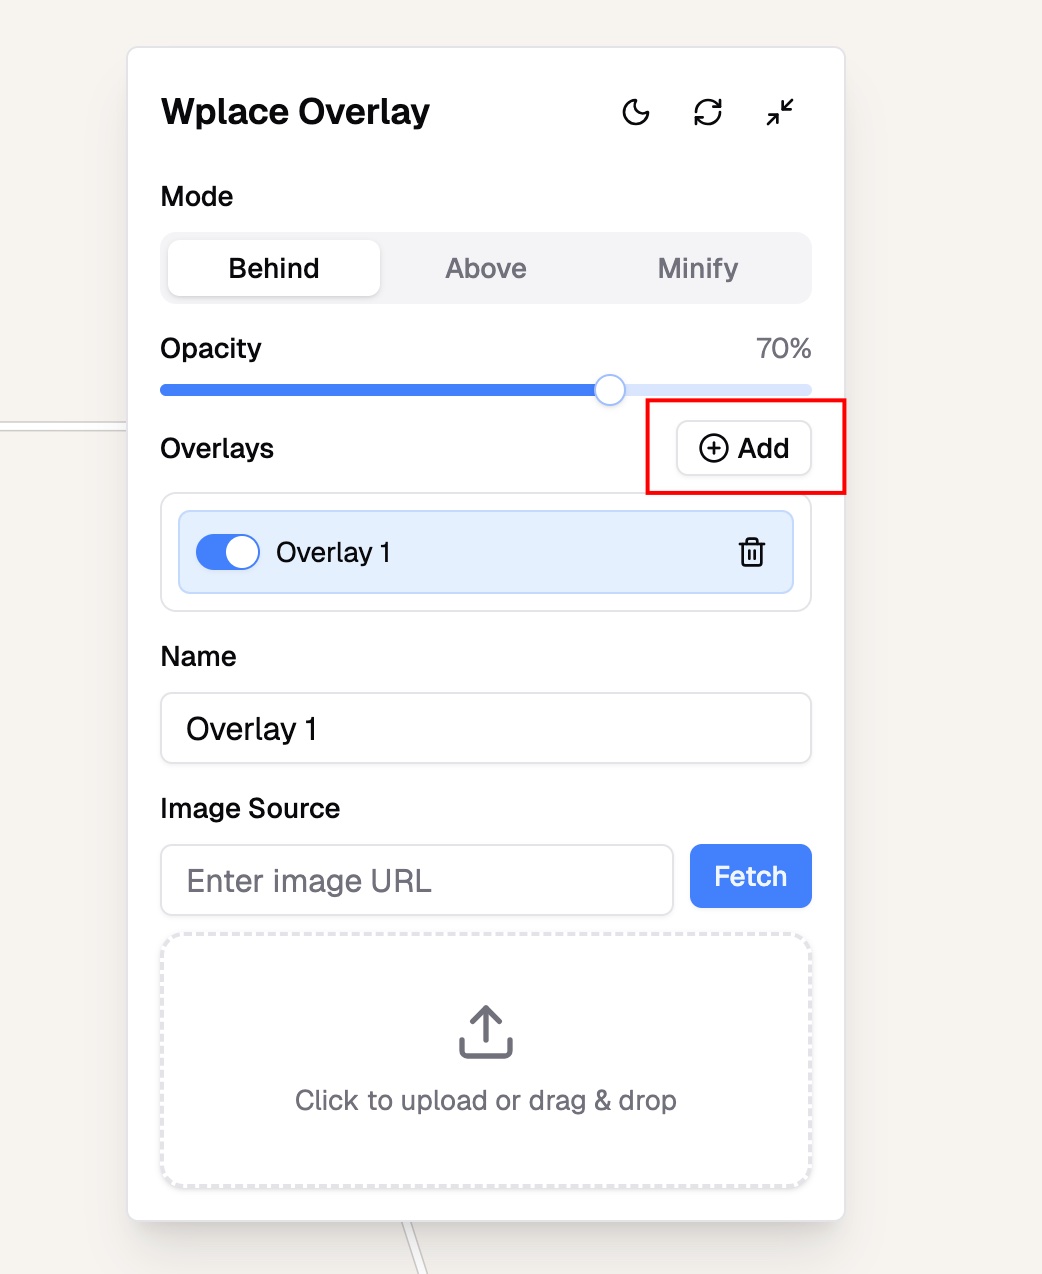
- Create a New Overlay and Add an Image
Click “Add” or the plus sign in the panel to create a new overlay. Click the image area to upload a local file or paste an image URL. A preview will be displayed after upload.

- Set the Anchor Point (Alignment Reference)
Enable the “Set Anchor” feature, then click the desired alignment point on the Wplace canvas. The extension will record this pixel as the anchor point to position your image accurately.
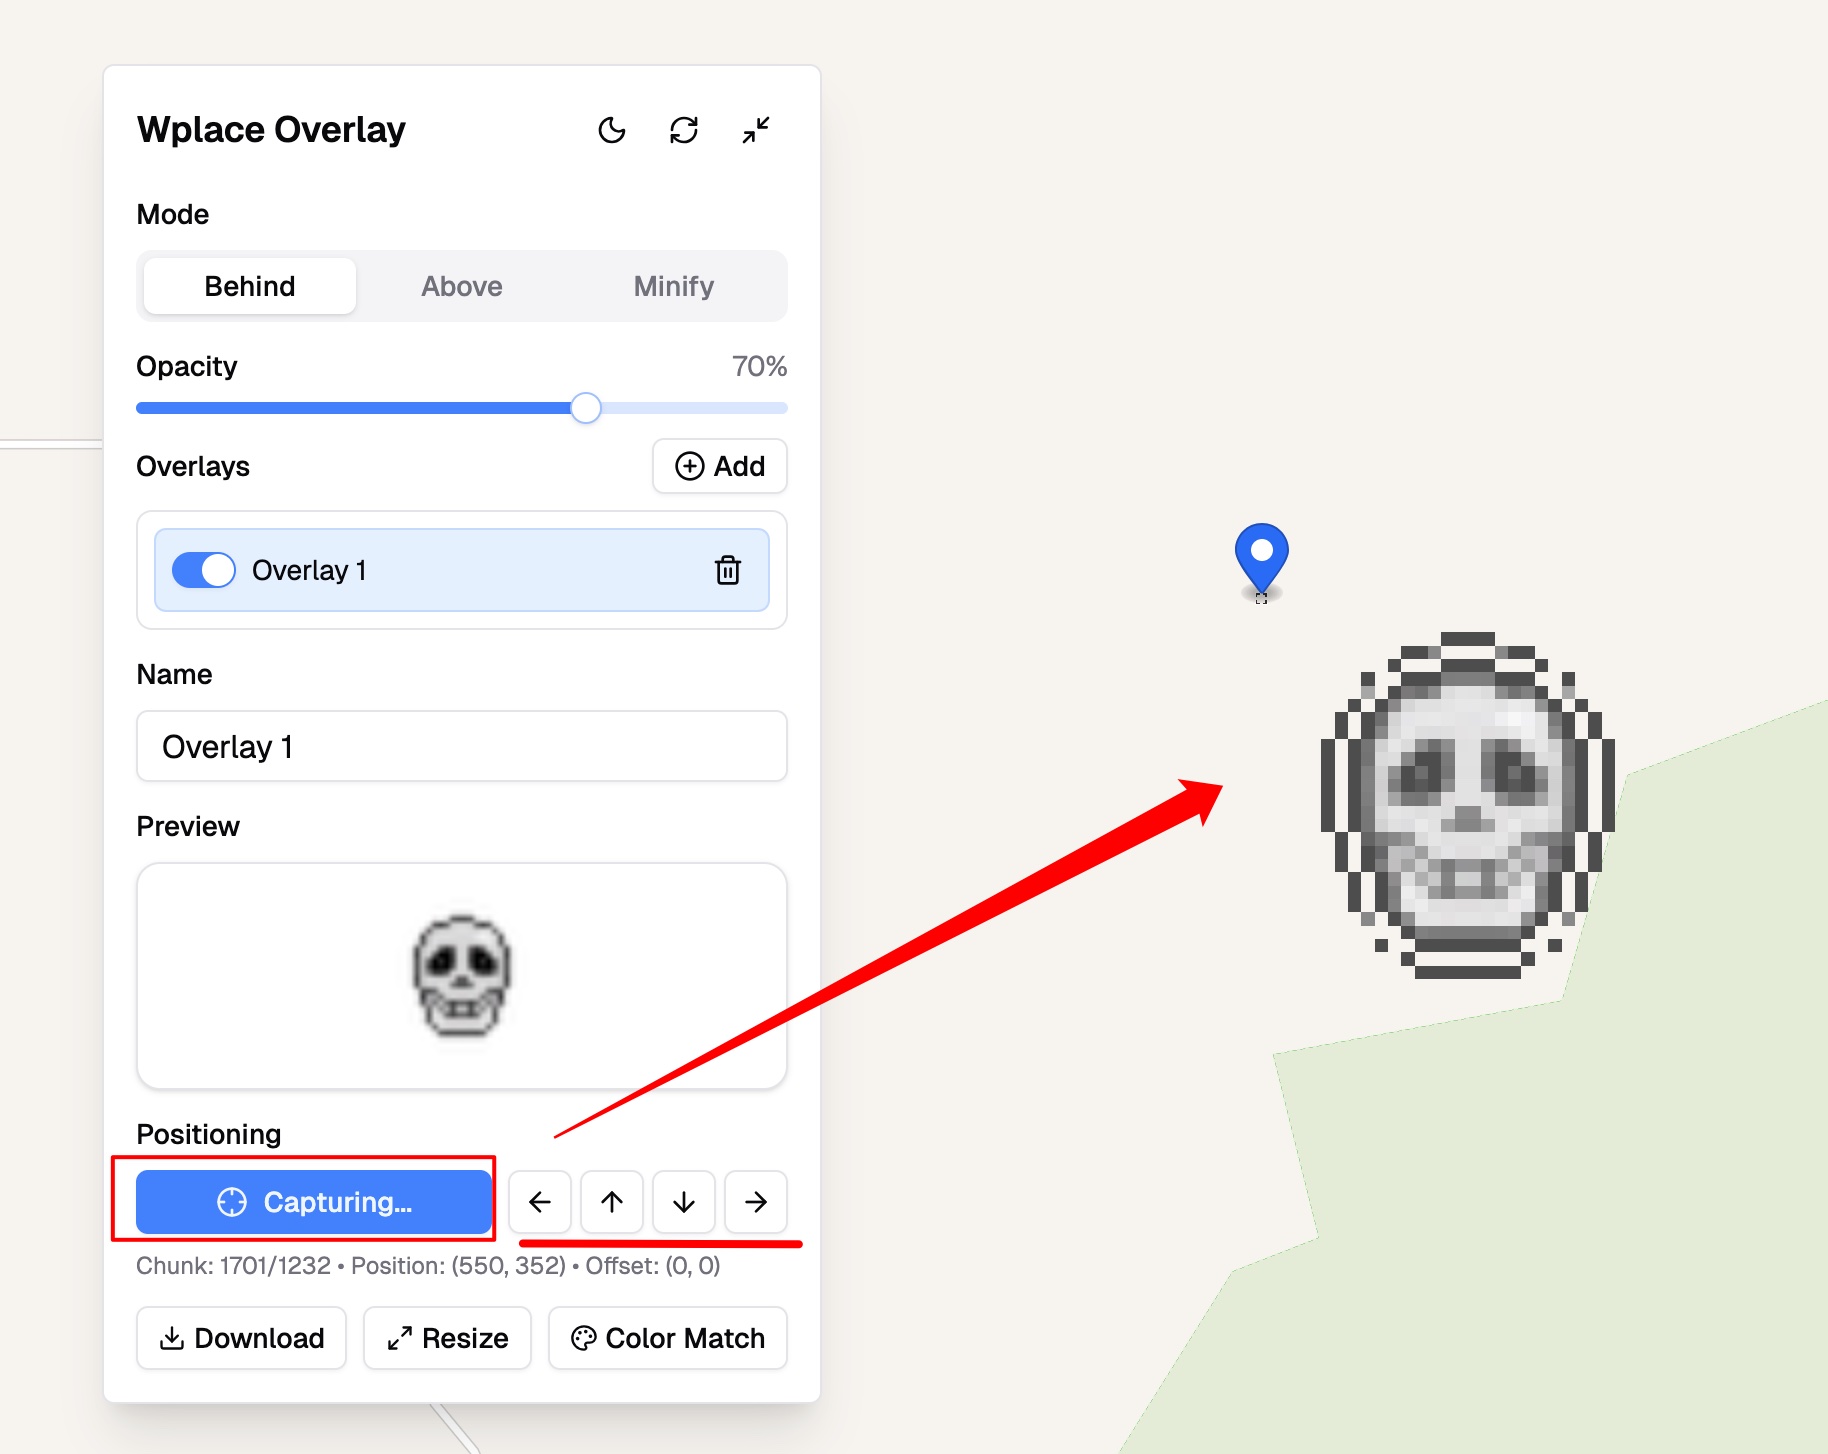
- Fine-Tune Position and Size
Use the arrow buttons to adjust position precisely. To resize, use the Resize feature within the extension.
- Choose Display Mode and Adjust Transparency
Select whether to place the image above or below the canvas, or display it in a pixel/symbol preview mode. Adjust the transparency slider to better view underlying pixels.
- Enable Overlay and Check the Result
Turn on the overlay toggle to see it on the canvas. If positioning or display isn’t perfect, repeat steps 4 and 5 to fine-tune.
- Optional Actions
For a pixel-perfect look, use the color-matching feature to map colors to Wplace’s palette. You can also export or import overlay configurations to share with others.
Extension Features
- Upload local images or use image URLs for overlays
- Auto-capture canvas pixels as anchor points for precise alignment
- Fine-tune image offset and scale
- Three display modes: above, below, or pixel/symbol preview
- Transparency control for seamless blending with the canvas
- Color matching to convert image colors to the Wplace palette (optional)
- Import and export overlay configurations for team sharing
- All settings are stored locally in your browser, never uploaded to external servers
Common Issues and Quick Fixes
-
Panel not visible?
Ensure the extension is enabled and refresh the wplace.live page. -
Image not showing?
Confirm the overlay is turned on and the anchor point is set. -
Alignment off?
Re-enable Auto Capture, click the anchor point again, then fine-tune with arrow buttons. -
Page running slow?
Use smaller images or switch to pixel/symbol preview mode for better performance.
Useful Tips
- Use transparent PNGs to overlay only the required parts without covering surrounding pixels.
- To temporarily hide an overlay, simply toggle it off without deleting the configuration.
- For large areas, use pixel/symbol preview mode for better performance.
- Export finished overlays to share with others for consistent display results.
Security and Privacy Notice
All extension settings and images are stored locally in your browser and are never uploaded to any server.
- Authors

- Name
- Official
- Website
- Wplace Tool